|
| |
RGV250/500 Conversion
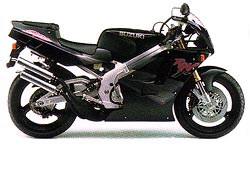
Hey........there's only two exhausts on this bike!!!
I've been waiting ages for someone to approach me with the offer
of converting a RGV250 with a Gamma 500 motor.
My prayers were answered when a guy called Trevor Powis rung me up and asked if I could do
the conversion. Obviously I jumped at the chance, he had already purchased the conversion
kit from Mark Drysdale as well as the Billet clutch cover and the Billet seat support.
The plan for me is to Mount the motor, tune the motor as well as making a custom set of
pipes for the complete package. All this will give in excess of 120hp at the rear wheel,
not bad for a dinky 250, eh?
I'm planning on fabricating a new rear subframe which will allow the new pipes to fit but
to also incorporate the oil tank and the battery box.
Well, I suppose I'd better get started on it. I'll update as
and when it happens!
Click on any picture to enlarge.
Decisions, decisions..........which motor shall I put in, I know the dirty one!
Step 1: Strip down to bare frame |

Step 2: Remove the upper mounting lugs |
 Step
3: Loosely fit engine using Mounting kit |
 Step
3: Loosely fit engine using Mounting kit |
 Step
4: Weld |
Step
5: Rebuild bike, fit motor |
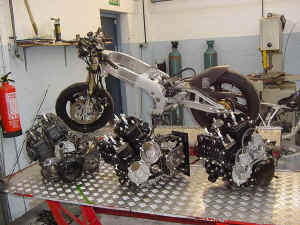
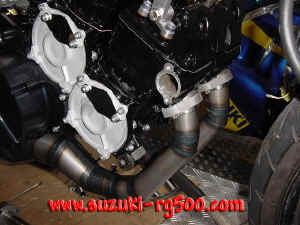
Exhaust Manufacture
Now the motor is fitted, the pipe routing has to be sorted out.
This is done by laser cutting sheet steel profiles of the finished exhaust shape and
taping to the bike in the correct position.
Profile to check pipe routing |
Pipes
tacked together |
View
showing #1 stinger exit |
First
stinger fitted |
Lower
pipes roughly fitted before welding |
Another
view |
Pipes
are designed fit within the seat unit |
 Top
pipes rolled and tacked together |
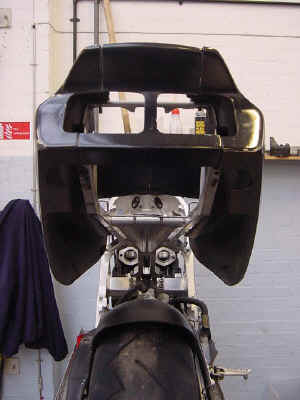 Sub-frame lower rails removed and seat support fitted |
 Top pipes now fit within the seat unit |
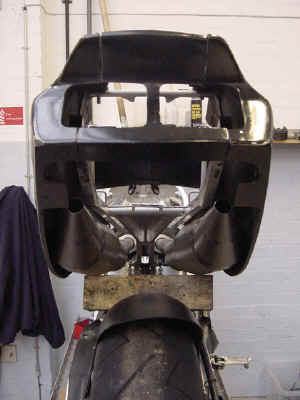
Four
pipes fitted |
Side
on of the four pipes |
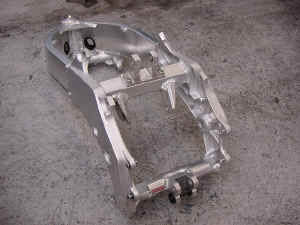
The subframe will be remade in ally and will include the oil tank and battery box, the
original frame has been used just for jigging purposes only.
Pipe manufacture will come to a stop now so i can concentrate on building the motor. Once
the motor is finished i can re-fit it and then finalize end can position to suit. Jigs for
these RGV conversion pipes will then be made so i can remake these pipes for anyone who is
undertaking a RGV500 conversion project. These pipes are to the exact same spec as the
pipes i run on my bike and have not been 'de-tuned' in any way.
|
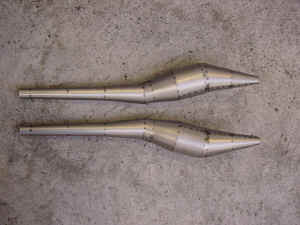
Pipes finally welded together |
 Exhaust
flanges, 'O' Ring type fitment |
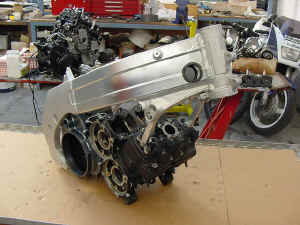
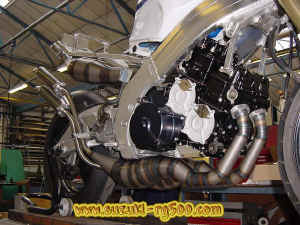
Rebuilt &
tuned motor.....120bhp RGV250 ? |
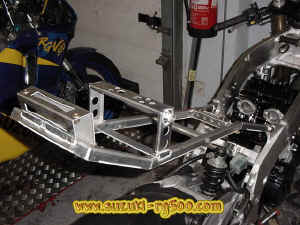 New
Aluminium Rear Sub-Frame |
Rear
Silencer Tie |
Side
Silencer Tie |
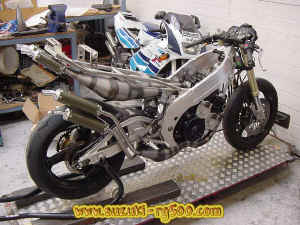 Four Pipes Fitted |
 Four Pipes Fitted |
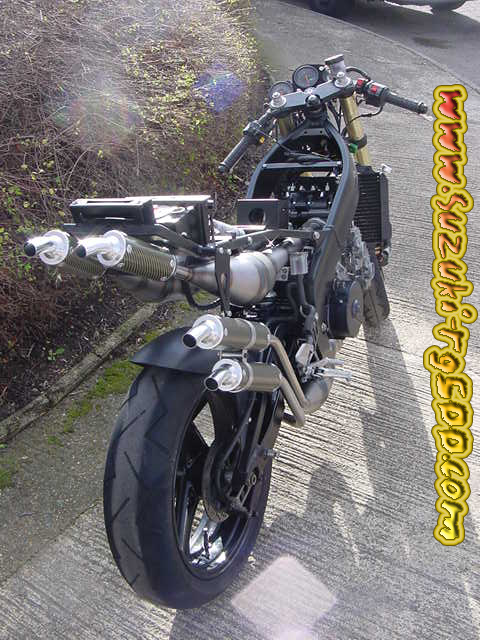
 The Best View In Motorcycling |
Oil
Tank Fabricated |
Oil Tank Fitted
|
I
made a bracket to hold the coils, CDI and SAEC controller |
Coil mount fitted, SAEC mounted under the plate |
Battery
box cut and folded |
Completed ready for painting :o) |
|

And that's about it!!!!!
Mark :o)
|


